- Home
- Connect your server
Connect your server to Conny.
Step 1: Find your SFTP details
You need a host, port, username and password.
Pterodactyl panels
Open the Settings tab and find SFTP Details. The password is your panel password.
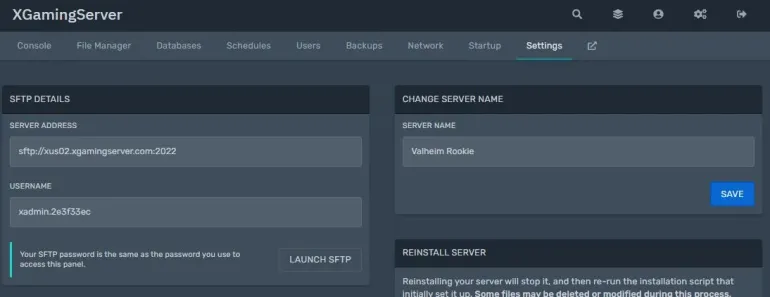
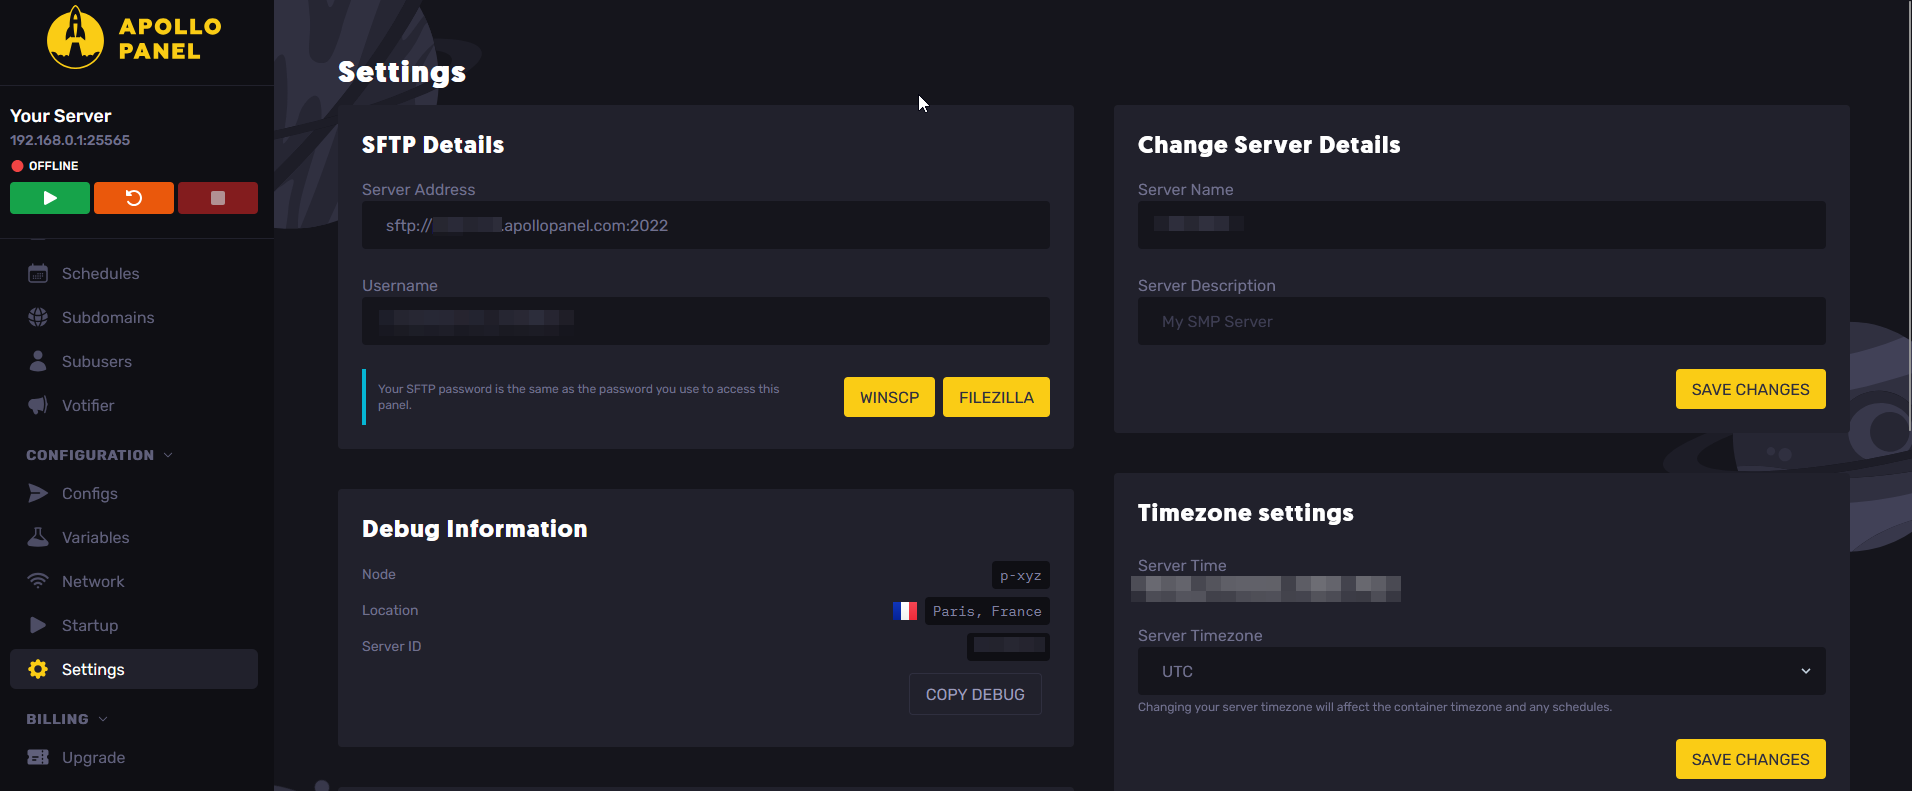
Sparked Host and other panels
Go to Settings and find SFTP Details. If your panel only shows FTP, ask your host for SFTP. FTP won’t work.
VPS or home server
Use your SSH login, usually port 22. Keys must have no passphrase.
Watch out: the port isn’t 25565 (panels often use 2022), and copy the full username, like name.1a2b3c4d.
Step 2: Create a workspace
Already have one? Skip to step 3.
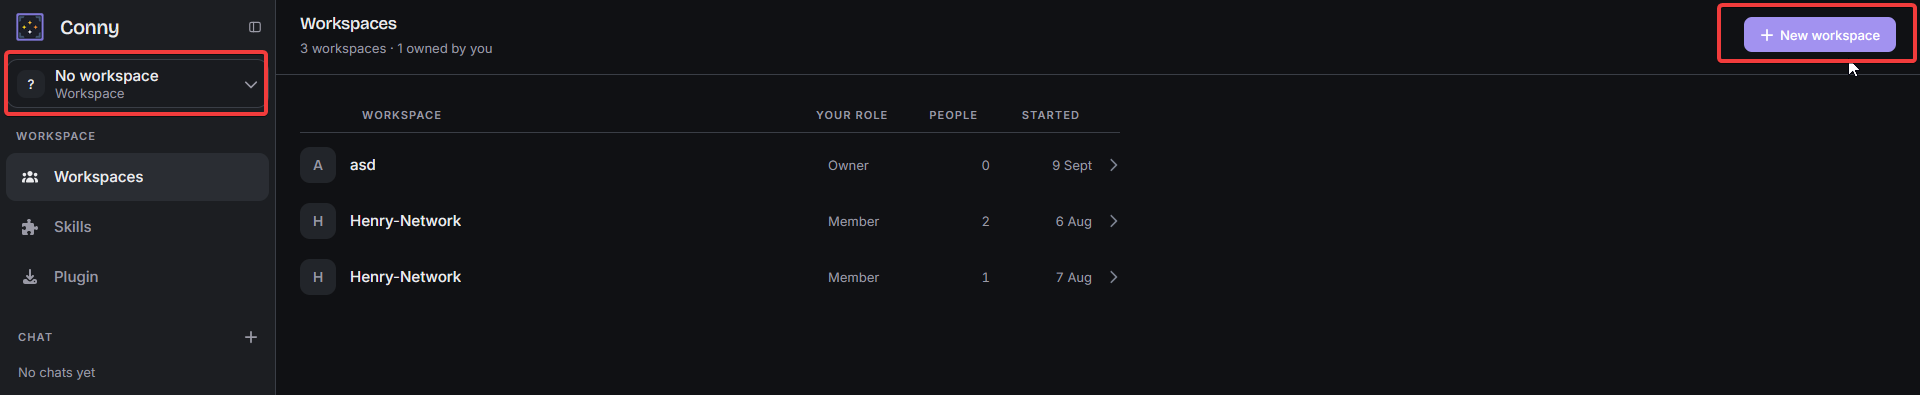
Open Conny and go to Workspaces in the sidebar. Press New workspace at the top right.
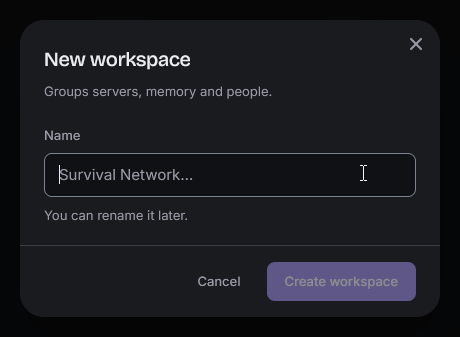
Give it a name and press Create workspace. A workspace holds your servers, Conny’s memory of them and the people you invite.
Step 3: Add the server
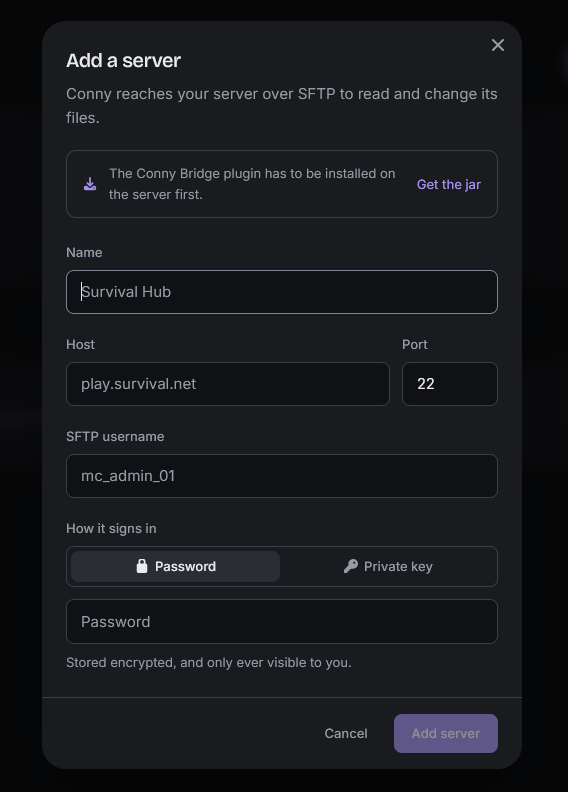
In your workspace, press Add server.
Paste the SFTP address into Host. The port and username fill in from it. Then add your password and press Add server.
Step 4: Copy the token
Conny shows it once, so copy it now. Lost it? Edit the server (pencil icon) and press Regenerate.
Step 5: Install the plugin
- In Conny, press Plugin in the sidebar, then Download the jar.
- Upload it to your server’s
pluginsfolder. - Restart the server.
Step 6: Paste the token
Open plugins → ConnyBridge → config.yml and put your token in:
server-token: "your-token"
Save, then run /conny reload in the console.
Step 7: Check it worked
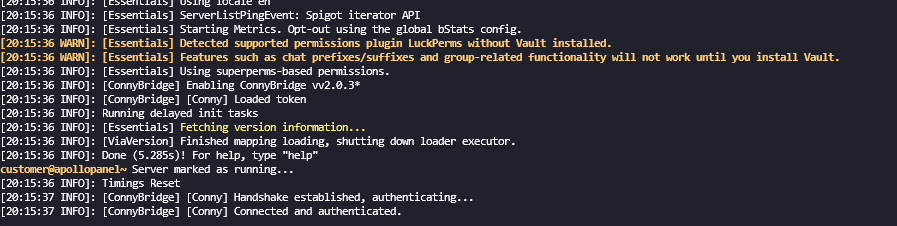
The console should say:
[Conny] Connected and authenticated.
Then ask Conny in a chat: “Check on my server status.”
Not working?
| Problem | Fix |
|---|---|
Authentication failed in the console | The token is wrong or missing. Paste it again, then run /conny reload. |
No [Conny] lines in the console | The jar isn’t in the plugins folder, or the server isn’t Spigot or Paper. |
Reconnecting in …s keeps repeating | Run /conny reconnect. If it continues, ask your host to allow outgoing connections to bridge.connyai.com on port 443. |
| Conny can’t log in over SFTP | Check the username suffix, the port and the password. Edit the server in Conny to fix them. |
| Add server is greyed out | You’ve hit your plan’s server limit. See plans. |
Still stuck? Get in touch.
Connect your server now
Have your SFTP details ready and keep this page open.
Questions
Do I need the plugin?
Yes. The plugin is what lets Conny run commands, read the live console and check TPS. Without it, Conny can only edit files.
Is my SFTP password safe?
It is encrypted when stored, and people you invite to your workspace never see it.
What if I lose the token?
Edit the server in Conny and press Regenerate, then paste the new token into config.yml and run /conny reload.